 To try this yourself, make sure that you are signed-in to the same Google Account on your computer and on your phone when searching. In addition, Web History needs to be enabled for your Google Account. Mobile users can turn on/off history by selecting "Save searches" or "Do not save searches" under Settings on google.com.
Your mobile and desktop search history now in sync
Sometimes I do a search on my desktop computer, only to find that I need to repeat the same search again later on my mobile phone. Today in the US we're launching Personalized Suggest for Android, iPhone and Palm WebOS, which makes it really easy to repeat your past searches on the go. For example, suppose that before I depart for the airport, I quickly check my flight status by searching for "american airlines 19" using google.com on my computer. Later, as I am hailing a taxi in rush hour traffic, I can open google.com on my phone, click in the search box, and choose "american airlines 19" from the list of search suggestions!
 To try this yourself, make sure that you are signed-in to the same Google Account on your computer and on your phone when searching. In addition, Web History needs to be enabled for your Google Account. Mobile users can turn on/off history by selecting "Save searches" or "Do not save searches" under Settings on google.com.
To try this yourself, make sure that you are signed-in to the same Google Account on your computer and on your phone when searching. In addition, Web History needs to be enabled for your Google Account. Mobile users can turn on/off history by selecting "Save searches" or "Do not save searches" under Settings on google.com.Introducing the new Local Search for Mobile
The mobile search team is always looking for new ways to make searching the world around you as easy and useful as searching the web. Today we're introducing a redesigned local search experience on your phone that integrates with Google Maps on your computer and includes browseable categories that let you search without typing. Let me tell you how I used these features on my recent vacation to Hawaii.
Before I left, I researched places to visit on Google Maps. I signed in to my Google account and starred the places I wanted to go. Once I got to Hawaii, by signing in on my phone, I was able to see the places I starred on desktop Maps under "Starred Places". I could then click through on place names to visit mobile-optimized versions of Place Pages for Google Maps that include opening hours, reviews, photos, and more.

The new category browse feature made it easy to find a place to rent bicycles for a quick tour of the coastline. I just tapped on "Entertainment & Recreation" and then "Bicycles" to execute a search — no typing necessary. When it was time for scuba diving, I didn't see an appropriate category, so I started typing "SCUBA" in the search box and clicked on a suggestion for "Scuba Tour Agency". A few hours later, I was petting a white-tipped reef shark!
 Of course, local search isn't only useful when you're traveling — here's an example of planning a birthday party in my hometown, San Francisco:
To access these features on your mobile device, go to www.google.com/m/local, or just click on the Local tab on www.google.com. The product is available in the US and China, with more regions coming soon.
Now available: Android 1.6 NDK
Today Android 1.6 NDK, release 1 is available for download from the Android developer site.
To recap, the NDK is a companion to the SDK that provides tools to generate and embed native ARM machine code within your application packages. This native code has the same restrictions as the VM code, but can execute certain operations much more rapidly. This is useful if you're doing heavy computations, digital processing, or even porting existing code bases written in C or C++.
If you already use the Android 1.5 NDK, upgrading to this release is highly recommended. It provides the following improvements:
- The ability to use OpenGL ES 1.1 headers and libraries
If your application targets Android 1.6, your native code can now directly call OpenGL ES 1.1 functions to perform graphics rendering. This will help those programs that need to send large amounts of vertex data to the GPU. Note, however, that activity lifecycle and surface creation must still be performed from the VM. This NDK contains a new sample ("san-angeles") that shows exactly how to do that with a GLSurfaceView object. - The ability to target either Android 1.5 or 1.6 devices
The NDK parses your project's properties to know which platform release it is targeting. It will then automatically use the proper headers and libraries to generate your native code. Any application that targets 1.5 will run on Android 1.5, Android 1.6 and any future official system release. Targeting 1.6 should, thus, only be done if your application requires new 1.6 features / APIs, like the ability to call OpenGL ES 1.x headers from native code. - The ability to put your native sources under your application's project tree
You can now conveniently place all your sources (C, C++ and Java) under the same tree, for editing or version control purposes. - Many fixes to the NDK's build scripts
The changes to the build scripts fix some annoying bugs and also increase host system compatibility.
If you have any questions, please join us in the Android NDK forum.
Zipalign: an easy optimization
The Android 1.6 SDK includes a tool called zipalign that optimizes the way an application is packaged. Doing this enables Android to interact with your application more efficiently and thus has the potential to make your application and the overall system run faster. We strongly encourage you to use zipalign on both new and already published applications and to make the optimized version available—even if your application targets a previous version of Android. We'll get into more detail on what zipalign does, how to use it, and why you'll want to do so in the rest of this post.
In Android, data files stored in each application's apk are accessed by multiple processes: the installer reads the manifest to handle the permissions associated with that application; the Home application reads resources to get the application's name and icon; the system server reads resources for a variety of reasons (e.g. to display that application's notifications); and last but not least, the resource files are obviously used by the application itself.
The resource-handling code in Android can efficiently access resources when they're aligned on 4-byte boundaries by memory-mapping them. But for resources that are not aligned (i.e. when zipalign hasn't been run on an apk), it has to fall back to explicitly reading them—which is slower and consumes additional memory.
For an application developer like you, this fallback mechanism is very convenient. It provides a lot of flexibility by allowing for several different development methods, including those that don't include aligning resources as part of their normal flow.
Unfortunately, the situation is reversed for users—reading resources from unaligned apks is slow and takes a lot of memory. In the best case, the only visible result is that both the Home application and the unaligned application launch slower than they otherwise should. In the worst case, installing several applications with unaligned resources increases memory pressure, thus causing the system to thrash around by having to constantly start and kill processes. The user ends up with a slow device with a poor battery life.
Luckily, it's very easy to align the resources:
- Using ADT:
- ADT (starting with 0.9.3) will automatically align release application packages if the export wizard is used to create them. To use the wizard, right click the project and choose "Android Tools" > "Export Signed Application Package..." It can also be accessed from the first page of the
AndroidManifest.xmleditor.
- ADT (starting with 0.9.3) will automatically align release application packages if the export wizard is used to create them. To use the wizard, right click the project and choose "Android Tools" > "Export Signed Application Package..." It can also be accessed from the first page of the
- Using Ant:
- The Ant build script that targets Android 1.6 (API level 4) can align application packages. Targets for older versions of the Android platform are not aligned by the Ant build script and need to be manually aligned.
- Debug packages built with Ant for Android 1.6 applications are aligned and signed by default.
- Release packages are aligned automatically only if Ant has enough information to sign the packages, since aligning has to happen after signing. In order to be able to sign packages, and therefore to align them, Ant needs to know the location of the keystore and the name of the key in
build.properties. The name of the properties arekey.storeandkey.aliasrespectively. If those properties are present, the signing tool will prompt to enter the store/key passwords during the build, and the script will sign and then align the apk file. If the properties are missing, the release package will not be signed, and therefore will not get aligned either.
- Manually:
- In order to manually align a package,
zipalignis in the tools folder of the Android 1.6 SDK. It can be used on application packages targeting any version of Android. It should be run after signing the apk file, using the following command:zipalign -v 4 source.apk destination.apk
- In order to manually align a package,
- Verifying alignment:
- The following command verifies that a package is aligned:
zipalign -c -v 4 application.apk
- The following command verifies that a package is aligned:
We encourage you manually run zipalign on your currently published applications and to make the newly aligned versions available to users. And don't forget to align any new applications going forward!
A Note on Google Apps for Android
Lately we've been busy bees in Mountain View, as you can see from the recent release of Android 1.6 to the open-source tree, not to mention some devices we're working on with partners that we think you'll really like. Of course, the community isn't sitting around either, and we've been seeing some really cool and impressive things, such as the custom Android builds that are popular with many enthusiasts. Recently there's been some discussion about an exchange we had with the developer of one of those builds, and I've noticed some confusion around what is and isn't part of Android's open source code. I want to take a few moments to clear up some of those misconceptions, and explain how Google's apps for Android fit in.
Everyone knows that mobile is a big deal, but for a long time it was hard to be a mobile app developer. Competing interests and the slow pace of platform innovation made it hard to create innovative apps. For our part, Google offers a lot of services — such as Google Search, Google Maps, and so on — and we found delivering those services to users' phones to be a very frustrating experience. But we also found that we weren't alone, so we formed the Open Handset Alliance, a group of like-minded partners, and created Android to be the platform that we all wished we had. To encourage broad adoption, we arranged for Android to be open-source. Google also created and operates Android Market as a service for developers to distribute their apps to Android users. In other words, we created Android because the industry needed an injection of openness. Today, we're thrilled to see all the enthusiasm that developers, users, and others in the mobile industry have shown toward Android.
With a high-quality open platform in hand, we then returned to our goal of making our services available on users' phones. That's why we developed Android apps for many of our services like YouTube, Gmail, Google Voice, and so on. These apps are Google's way of benefiting from Android in the same way that any other developer can, but the apps are not part of the Android platform itself. We make some of these apps available to users of any Android-powered device via Android Market, and others are pre-installed on some phones through business deals. Either way, these apps aren't open source, and that's why they aren't included in the Android source code repository. Unauthorized distribution of this software harms us just like it would any other business, even if it's done with the best of intentions.
I hope that clears up some of the confusion around Google's apps for Android. We always love seeing novel uses of Android, including custom Android builds from developers who see a need. I look forward to seeing what comes next!
ADC 2 Judging Has Begun!
![]()
 I am happy to announce that Android Developer Challenge 2's first round of judging has begun!
As a reminder, user voting determines which apps will make it to the second round. Voting will occur through an application called Android Developer Challenge 2, which is now available for download from Android Market. Android Developer Challenge 2 presents apps for each user to download and score according to a set of criteria, such as originality and effective use of the Android platform, among others. The first round of judging will last at least two weeks from today. Judging will continue until we receive a sufficient number of votes to identify the top 20 applications in each of the 10 categories (200 apps total) that qualify for the second round.
During the second round, judging will occur through a combination of user voting and input from a panel of industry experts. User voting will continue to occur via Android Developer Challenge 2 and will account for 40% of the final score that each app receives in round two. The remaining 60% of the final score will be determined by the industry expert panel.
It has been a little less than a year since the first Android-powered phones became available. Today, there are more than 10,000 applications available in Android Market. We are pleased by the energy and commitment demonstrated by developers in such a short period of time. Our goal with Android Developer Challenge 2 is to inspire the developer community to produce even more innovative apps for Android. Now on to the voting!
Download Android Developer Challenge 2:
The Iterative Web App: 'Move' and 'Enhanced Refresh'
On April 7th, we announced a new version of Gmail for mobile for iPhone and Android-powered devices. Among the improvements was a complete redesign of the web application's underlying code which allows us to more rapidly develop and release new features that users have been asking for, as explained in our first post. We'd like to introduce The Iterative Webapp, a series where we will continue to release features for Gmail for mobile. Today: 'Move' and 'Enhanced Refresh.'
Last week we released two new features which can save you clicks when using web-based Gmail on an iPhone or Android-powered device.
 The first one is 'Move', which you can find under 'More' in the Floaty Bar. The 'Move' function lets you label and archive a message in a single step. So as soon as you 'move' a conversation to a certain label, that email will disappear from your Inbox and show up under that label. We introduced this feature to Gmail for your PC earlier this year, and now we're making it available for your mobile phone as well.
Another improvement we made is 'Enhanced Refresh.' With this feature, your Gmail inbox auto-refreshes when you switch back to Gmail from another tab or application. And if your phone goes to sleep while Gmail is open, it will refresh when you wake it up.
To try out Gmail for mobile, visit gmail.com in your mobile browser. This version of Gmail for mobile supports iPhone/iPod touch OS 2.2.1 or above, as well as all Android-powered devices, and is available in US English only. To make it easy to access your Gmail account, try creating a home screen link.
by Heaven Kim, Product Marketing Manager, Google Mobile
Google Mobile App for Windows Mobile gets My Location and more
It's easier and faster than ever to search Google using your Windows Mobile phone. Just visit m.google.com to download the latest version of Google Mobile App, which includes these new features:
- My Location. Get local results without typing your location. Once you see the blue My Location dot with your current location below the search box, simply search for a local query, for example "italian restaurant", and the search results will contain local business results along with web results.
To protect your privacy, location is encrypted when sent to the server, and only your most recent location is stored so that successive searches can use the same location. You can disable My Location at any time in the "Advanced Options" screen. - Google Suggest. Reduce typing time by selecting suggestions to complete your queries. You will also see URL suggestions, which bring you directly to a web page, skipping the search results page entirely. Try typing "facebook" to see this kind of suggestion.
- Search with Maps. If you have installed Google Maps, type a local query and wait for suggestions. Select the suggestion with the red pin next to it to launch your search inside Google Maps.


To download the new version of Google Mobile App, visit m.google.com from your phone.
An introduction to Text-To-Speech in Android
We've introduced a new feature in version 1.6 of the Android platform: Text-To-Speech (TTS). Also known as "speech synthesis", TTS enables your Android device to "speak" text of different languages.
Before we explain how to use the TTS API itself, let's first review a few aspects of the engine that will be important to your TTS-enabled application. We will then show how to make your Android application talk and how to configure the way it speaks.
Languages and resources
About the TTS resources
The TTS engine that ships with the Android platform supports a number of languages: English, French, German, Italian and Spanish. Also, depending on which side of the Atlantic you are on, American and British accents for English are both supported.
The TTS engine needs to know which language to speak, as a word like "Paris", for example, is pronounced differently in French and English. So the voice and dictionary are language-specific resources that need to be loaded before the engine can start to speak.
Although all Android-powered devices that support the TTS functionality ship with the engine, some devices have limited storage and may lack the language-specific resource files. If a user wants to install those resources, the TTS API enables an application to query the platform for the availability of language files and can initiate their download and installation. So upon creating your activity, a good first step is to check for the presence of the TTS resources with the corresponding intent:
Intent checkIntent = new Intent();
checkIntent.setAction(TextToSpeech.Engine.ACTION_CHECK_TTS_DATA);
startActivityForResult(checkIntent, MY_DATA_CHECK_CODE);
A successful check will be marked by a CHECK_VOICE_DATA_PASS result code, indicating this device is ready to speak, after the creation of our android.speech.tts.TextToSpeech object. If not, we need to let the user know to install the data that's required for the device to become a multi-lingual talking machine! Downloading and installing the data is accomplished by firing off the ACTION_INSTALL_TTS_DATA intent, which will take the user to Android Market, and will let her/him initiate the download. Installation of the data will happen automatically once the download completes. Here is an example of what your implementation of onActivityResult() would look like:
private TextToSpeech mTts;
protected void onActivityResult(
        int requestCode, int resultCode, Intent data) {
    if (requestCode == MY_DATA_CHECK_CODE) {
        if (resultCode == TextToSpeech.Engine.CHECK_VOICE_DATA_PASS) {
            // success, create the TTS instance
            mTts = new TextToSpeech(this, this);
        } else {
            // missing data, install it
            Intent installIntent = new Intent();
            installIntent.setAction(
                TextToSpeech.Engine.ACTION_INSTALL_TTS_DATA);
            startActivity(installIntent);
        }
    }
}
In the constructor of the TextToSpeech instance we pass a reference to the Context to be used (here the current Activity), and to an OnInitListener (here our Activity as well). This listener enables our application to be notified when the Text-To-Speech engine is fully loaded, so we can start configuring it and using it.
Languages and Locale
At Google I/O, we showed an example of TTS where it was used to speak the result of a translation from and to one of the 5 languages the Android TTS engine currently supports. Loading a language is as simple as calling for instance:
mTts.setLanguage(Locale.US);
to load and set the language to English, as spoken in the country "US". A locale is the preferred way to specify a language because it accounts for the fact that the same language can vary from one country to another. To query whether a specific Locale is supported, you can use isLanguageAvailable(), which returns the level of support for the given Locale. For instance the calls:
mTts.isLanguageAvailable(Locale.UK))
mTts.isLanguageAvailable(Locale.FRANCE))
mTts.isLanguageAvailable(new Locale("spa", "ESP")))
will return TextToSpeech.LANG_COUNTRY_AVAILABLE to indicate that the language AND country as described by the Locale parameter are supported (and the data is correctly installed). But the calls:
mTts.isLanguageAvailable(Locale.CANADA_FRENCH))
mTts.isLanguageAvailable(new Locale("spa"))
will return TextToSpeech.LANG_AVAILABLE. In the first example, French is supported, but not the given country. And in the second, only the language was specified for the Locale, so that's what the match was made on.
Also note that besides the ACTION_CHECK_TTS_DATA intent to check the availability of the TTS data, you can also use isLanguageAvailable() once you have created your TextToSpeech instance, which will return TextToSpeech.LANG_MISSING_DATA if the required resources are not installed for the queried language.
Making the engine speak an Italian string while the engine is set to the French language will produce some pretty interesting results, but it will not exactly be something your user would understand So try to match the language of your application's content and the language that you loaded in your TextToSpeech instance. Also if you are using Locale.getDefault() to query the current Locale, make sure that at least the default language is supported.
Making your application speak
Now that our TextToSpeech instance is properly initialized and configured, we can start to make your application speak. The simplest way to do so is to use the speak() method. Let's iterate on the following example to make a talking alarm clock:
String myText1 = "Did you sleep well?";
String myText2 = "I hope so, because it's time to wake up.";
mTts.speak(myText1, TextToSpeech.QUEUE_FLUSH, null);
mTts.speak(myText2, TextToSpeech.QUEUE_ADD, null);
The TTS engine manages a global queue of all the entries to synthesize, which are also known as "utterances". Each TextToSpeech instance can manage its own queue in order to control which utterance will interrupt the current one and which one is simply queued. Here the first speak() request would interrupt whatever was currently being synthesized: the queue is flushed and the new utterance is queued, which places it at the head of the queue. The second utterance is queued and will be played after myText1 has completed.
Using optional parameters to change the playback stream type
On Android, each audio stream that is played is associated with one stream type, as defined in android.media.AudioManager. For a talking alarm clock, we would like our text to be played on the AudioManager.STREAM_ALARM stream type so that it respects the alarm settings the user has chosen on the device. The last parameter of the speak() method allows you to pass to the TTS engine optional parameters, specified as key/value pairs in a HashMap. Let's use that mechanism to change the stream type of our utterances:
HashMap<String, String> myHashAlarm = new HashMap();
myHashAlarm.put(TextToSpeech.Engine.KEY_PARAM_STREAM,
        String.valueOf(AudioManager.STREAM_ALARM));
mTts.speak(myText1, TextToSpeech.QUEUE_FLUSH, myHashAlarm);
mTts.speak(myText2, TextToSpeech.QUEUE_ADD, myHashAlarm);
Using optional parameters for playback completion callbacks
Note that speak() calls are asynchronous, so they will return well before the text is done being synthesized and played by Android, regardless of the use of QUEUE_FLUSH or QUEUE_ADD. But you might need to know when a particular utterance is done playing. For instance you might want to start playing an annoying music after myText2 has finished synthesizing (remember, we're trying to wake up the user). We will again use an optional parameter, this time to tag our utterance as one we want to identify. We also need to make sure our activity implements the TextToSpeech.OnUtteranceCompletedListener interface:
mTts.setOnUtteranceCompletedListener(this);
myHashAlarm.put(TextToSpeech.Engine.KEY_PARAM_STREAM,
        String.valueOf(AudioManager.STREAM_ALARM));
mTts.speak(myText1, TextToSpeech.QUEUE_FLUSH, myHashAlarm);
myHashAlarm.put(TextToSpeech.Engine.KEY_PARAM_UTTERANCE_ID,
        "end of wakeup message ID");
// myHashAlarm now contains two optional parameters
mTts.speak(myText2, TextToSpeech.QUEUE_ADD, myHashAlarm);
And the Activity gets notified of the completion in the implementation of the listener:
public void onUtteranceCompleted(String uttId) {
    if (uttId == "end of wakeup message ID") {
        playAnnoyingMusic();
    }
}
File rendering and playback
While the speak() method is used to make Android speak the text right away, there are cases where you would want the result of the synthesis to be recorded in an audio file instead. This would be the case if, for instance, there is text your application will speak often; you could avoid the synthesis CPU-overhead by rendering only once to a file, and then playing back that audio file whenever needed. Just like for speak(), you can use an optional utterance identifier to be notified on the completion of the synthesis to the file:
HashMap<String, String> myHashRender = new HashMap();
String wakeUpText = "Are you up yet?";
String destFileName = "/sdcard/myAppCache/wakeUp.wav";
myHashRender.put(TextToSpeech.Engine.KEY_PARAM_UTTERANCE_ID, wakeUpText);
mTts.synthesizeToFile(wakuUpText, myHashRender, destFileName);
Once you are notified of the synthesis completion, you can play the output file just like any other audio resource with android.media.MediaPlayer.
But the TextToSpeech class offers other ways of associating audio resources with speech. So at this point we have a WAV file that contains the result of the synthesis of "Wake up" in the previously selected language. We can tell our TTS instance to associate the contents of the string "Wake up" with an audio resource, which can be accessed through its path, or through the package it's in, and its resource ID, using one of the two addSpeech() methods:
mTts.addSpeech(wakeUpText, destFileName);
This way any call to speak() for the same string content as wakeUpText will result in the playback of destFileName. If the file is missing, then speak will behave as if the audio file wasn't there, and will synthesize and play the given string. But you can also take advantage of that feature to provide an option to the user to customize how "Wake up" sounds, by recording their own version if they choose to. Regardless of where that audio file comes from, you can still use the same line in your Activity code to ask repeatedly "Are you up yet?":
mTts.speak(wakeUpText, TextToSpeech.QUEUE_ADD, myHashAlarm);
When not in use...
The text-to-speech functionality relies on a dedicated service shared across all applications that use that feature. When you are done using TTS, be a good citizen and tell it "you won't be needing its services anymore" by calling mTts.shutdown(), in your Activity onDestroy() method for instance.
Conclusion
Android now talks, and so can your apps. Remember that in order for synthesized speech to be intelligible, you need to match the language you select to that of the text to synthesize. Text-to-speech can help you push your app in new directions. Whether you use TTS to help users with disabilities, to enable the use of your application while looking away from the screen, or simply to make it cool, we hope you'll enjoy this new feature.
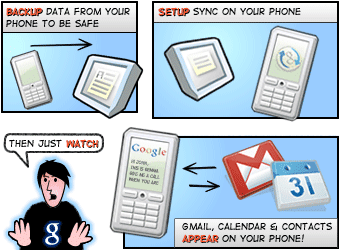
Google Sync: Now with push Gmail support
Earlier this year, we launched Google Sync which allows you to synchronize your Gmail Contacts and Google Calendar with your iPhone, Windows Mobile, and S60 devices. Today, we're adding Gmail support to Google Sync for iPhone, iPod Touch and Windows Mobile devices.
Using Google Sync, you can now get your Gmail messages pushed directly to your phone. Having an over-the-air, always-on connection means that your inbox is up to date, no matter where you are or what you're doing. Sync works with your phone's native email application so there's no additional software needed. Only interested in syncing your Gmail, but not your Calendar? Google Sync allows you to sync just your Contacts, Calendar, or Gmail, or any combination of the three.
To try Google Sync, visit m.google.com/sync from your computer. If you're already using Google Sync, learn how to enable Gmail sync. Since push Gmail has been a popular request on our Product Ideas page and Help Forum, we look forward to hearing your feedback, so drop us a line and let us know how it's working or what you'd like to see next.
Update at 8:20am: We jumped the gun on this post. The new feature should be rolling out in a few minutes.
Using Google Sync, you can now get your Gmail messages pushed directly to your phone. Having an over-the-air, always-on connection means that your inbox is up to date, no matter where you are or what you're doing. Sync works with your phone's native email application so there's no additional software needed. Only interested in syncing your Gmail, but not your Calendar? Google Sync allows you to sync just your Contacts, Calendar, or Gmail, or any combination of the three.

To try Google Sync, visit m.google.com/sync from your computer. If you're already using Google Sync, learn how to enable Gmail sync. Since push Gmail has been a popular request on our Product Ideas page and Help Forum, we look forward to hearing your feedback, so drop us a line and let us know how it's working or what you'd like to see next.
Update at 8:20am: We jumped the gun on this post. The new feature should be rolling out in a few minutes.
Introducing Quick Search Box for Android
One of the new features we're really proud of in the Android 1.6 release is Quick Search Box for Android. This is our new system-wide search framework, which makes it possible for users to quickly and easily find what they're looking for, both on their devices and on the web. It suggests content on your device as you type, like apps, contacts, browser history, and music. It also offers results from the web search suggestions, local business listings, and other info from Google, such as stock quotes, weather, and flight status. All of this is available right from the home screen, by tapping on Quick Search Box (QSB).
What we're most excited about with this new feature is the ability for you, the developers, to leverage the QSB framework to provide quicker and easier access to the content inside your apps. Your apps can provide search suggestions that will surface to users in QSB alongside other search results and suggestions. This makes it possible for users to access your application's content from outside your application—for example, from the home screen.
The code fragments below are related to a new demo app for Android 1.6 called Searchable Dictionary.
The story before now: searching within your app
In previous releases, we already provided a mechanism for you to expose search and search suggestions in your app as described in the docs for SearchManager. This mechanism has not changed and requires the following two things in your AndroidManifest.xml:
1) In your <activity>, an intent filter, and a reference to a searchable.xml file (described below):
<intent-filter>
    <action android:name="android.intent.action.SEARCH" />
    <category android:name="android.intent.category.DEFAULT" />
</intent-filter>

<meta-data android:name="android.app.searchable"
       android:resource="@xml/searchable" />
2) A content provider that can provide search suggestions according to the URIs and column formats specified by the Search Suggestions section of the SearchManager docs:
<!-- Provides search suggestions for words and their definitions. -->
<provider android:name="DictionaryProvider"
       android:authorities="dictionary"
       android:syncable="false" />
In the searchable.xml file, you specify a few things about how you want the search system to present search for your app, including the authority of the content provider that provides suggestions for the user as they type. Here's an example of the searchable.xml of an Android app that provides search suggestions within its own activities:
<searchable xmlns:android="http://schemas.android.com/apk/res/android"
        android:label="@string/search_label"
        android:searchSuggestAuthority="dictionary"
        android:searchSuggestIntentAction="android.intent.action.VIEW">
</searchable>
Note that the android:searchSuggestAuthority attribute refers to the authority of the content provider we declared in AndroidManifest.xml.
For more details on this, see the Searchability Metadata section of the SearchManager docs.
Including your app in Quick Search Box
In Android 1.6, we added a new attribute to the metadata for searchables: android:includeInGlobalSearch. By specifying this as "true" in your searchable.xml, you allow QSB to pick up your search suggestion content provider and include its suggestions along with the rest (if the user enables your suggestions from the system search settings).
You should also specify a string value for android:searchSettingsDescription, which describes to users what sorts of suggestions your app provides in the system settings for search.
<searchable xmlns:android="http://schemas.android.com/apk/res/android"
       android:label="@string/search_label"
       android:searchSettingsDescription="@string/settings_description"
       android:includeInGlobalSearch="true"
       android:searchSuggestAuthority="dictionary"
       android:searchSuggestIntentAction="android.intent.action.VIEW">
</searchable>
These new attributes are supported only in Android 1.6 and later.
What to expect
The first and most important thing to note is that when a user installs an app with a suggestion provider that participates in QSB, this new app will not be enabled for QSB by default. The user can choose to enable particular suggestion sources from the system settings for search (by going to "Search" > "Searchable items" in settings).
You should consider how to handle this in your app. Perhaps show a notice that instructs the user to visit system settings and enable your app's suggestions.
Once the user enables your searchable item, the app's suggestions will have a chance to show up in QSB, most likely under the "more results" section to begin with. As your app's suggestions are chosen more frequently, they can move up in the list.
Shortcuts
One of our objectives with QSB is to make it faster for users to access the things they access most often. One way we've done this is by 'shortcutting' some of the previously chosen search suggestions, so they will be shown immediately as the user starts typing, instead of waiting to query the content providers. Suggestions from your app may be chosen as shortcuts when the user clicks on them.
For dynamic suggestions that may wish to change their content (or become invalid) in the future, you can provide a 'shortcut id'. This tells QSB to query your suggestion provider for up-to-date content for a suggestion after it has been displayed. For more details on how to manage shortcuts, see the Shortcuts section within the SearchManager docs.
QSB provides a really cool way to make your app's content quicker to access by users. To help you get your app started with it, we've created a demo app which simply provides access to a small dictionary of words in QSB—it's called Searchable Dictionary, and we encourage you to check it out.
Android 1.6 SDK is here
 I am happy to let you know that Android 1.6 SDK is available for download. Android 1.6, which is based on the donut branch from the Android Open Source Project, introduces a number of new features and technologies. With support for CDMA and additional screen sizes, your apps can be deployed on even more mobile networks and devices. You will have access to new technologies, including framework-level support for additional screen resolutions, like QVGA and WVGA, new telephony APIs to support CDMA, gesture APIs, a text-to-speech engine, and the ability to integrate with Quick Search Box. What's new in Android 1.6 provides a more complete overview of this platform update.
The Android 1.6 SDK requires a new version of Android Development Tools (ADT). The SDK also includes a new tool that enables you to download updates and additional components, such as new add-ons or platforms.
You can expect to see devices running Android 1.6 as early as October. As with previous platform updates, applications written for older versions of Android will continue to run on devices with Android 1.6. Please test your existing apps on the Android 1.6 SDK to make sure they run as expected.
Over the next several weeks, we will publish a series of blog posts to help you get ready for the new developer technologies in Android 1.6. The following topics, and more, will be covered: how to adapt your applications to support different screen sizes, integrating with Quick Search Box, building gestures into your apps, and using the text-to-speech engine.
If you are interested to see some highlights of Android 1.6, check out the video below.
Happy coding!
Google Fast Flip for Android and iPhone
Browsing print and online articles on a phone can often be a slow task. There are many different sites to visit, and media-rich pages can take a long time to load. Of course, mobile devices make this more difficult with small screens, slower Internet connections, and less comfortable keyboards.
To help solve this problem, today we announced a new product from Google Labs: Google Fast Flip for computers, iPhone, and Android-powered devices. Google Fast Flip combines some of the best features of reading articles in print and on the web.
With this webapp you can literally flip through stories with the swipe of your finger. To get more information or view the entire article, simply tap on the screen. You can browse headlines and popular articles, and view trending topics. Searching for a specific topic lets you make your own "magazine." Fast Flip makes sharing articles easy as well. To send an article to someone, simply tap on the "Email" link in the upper right.
.jpg)


To try it out, point your mobile browser to fastflip.googlelabs.com. For easy access, we recommend creating a home screen link or bookmark. Fast Flip works on all iPhone, iPod Touch and Android-powered devices. For more information on Google Fast Flip, check out our post on the Official Google Blog.
Posted by Steve Kanefsky, Software Engineer, Google Mobile
To help solve this problem, today we announced a new product from Google Labs: Google Fast Flip for computers, iPhone, and Android-powered devices. Google Fast Flip combines some of the best features of reading articles in print and on the web.
With this webapp you can literally flip through stories with the swipe of your finger. To get more information or view the entire article, simply tap on the screen. You can browse headlines and popular articles, and view trending topics. Searching for a specific topic lets you make your own "magazine." Fast Flip makes sharing articles easy as well. To send an article to someone, simply tap on the "Email" link in the upper right.
To try it out, point your mobile browser to fastflip.googlelabs.com. For easy access, we recommend creating a home screen link or bookmark. Fast Flip works on all iPhone, iPod Touch and Android-powered devices. For more information on Google Fast Flip, check out our post on the Official Google Blog.
Posted by Steve Kanefsky, Software Engineer, Google Mobile
Some News from Android Market
I'm pleased to let you know about several updates to Android Market. First, we will soon introduce new features in Android Market for Android 1.6 that will improve the overall experience for users. As part of this change, developers will be able to provide screenshots, promotional icons and descriptions that will better show off applications and games.
We have also added four new sub-categories for applications: sports, health, themes, and comics. Developers can now choose these sub-categories for both new and existing applications via the publisher website. Finally, we have added seller support for developers in Italy. Italian developers can go to the publisher website to upload applications and target any of the countries where paid applications are currently available to users.
To take advantage of the upcoming Android Market refresh, we encourage you to visit the Android Market publisher website and upload additional marketing assets. Check out the video below for some of the highlights.
Subscribe to:
Comments (Atom)