Announcing Google Maps Navigation for Android 2.0

(cross-posted on the Official Google Blog)

Since 2005, millions of people have relied on Google Maps for mobile to get directions on the go. However, there's always been one problem: Once you're behind the wheel, a list of driving directions just isn't that easy to use. It doesn't tell you when your turn is coming up. And if you miss a turn? Forget it, you're on your own.

Today we're excited to announce the next step for Google Maps for mobile: Google Maps Navigation (Beta) for Android 2.0 devices.

This new feature comes with everything you'd expect to find in a GPS navigation system, like 3D views, turn-by-turn voice guidance and automatic rerouting. But unlike most navigation systems, Google Maps Navigation was built from the ground up to take advantage of your phone's Internet connection.

Here are seven features that are possible because Google Maps Navigation is connected to the Internet:

The most recent map and business data
When you use Google Maps Navigation, your phone automatically gets the most up-to-date maps and business listings from Google Maps — you never need to buy map upgrades or update your device. And this data is continuously improving, thanks to users who report maps issues and businesses who activate their listings with Google Local Business Center.

Search in plain English
Google Maps Navigation brings the speed, power and simplicity of Google search to your car. If you don't know the address you're looking for, don't worry. Simply enter the name of a business, a landmark or just about anything into the search box, and Google will find it for you. Then press "Navigate", and you're on your way.

Search by voice
Typing on a phone can be difficult, especially in the car, so with Google Maps Navigation, you can say your destination instead. Hold down the search button to activate voice search, then tell your phone what you want to do (like "Navigate to Pike Place in Seattle"), and navigation will start automatically.

Traffic view
Google Maps Navigation gets live traffic data over the Internet. A traffic indicator light in the corner of the screen glows green, yellow or red, depending on the current traffic conditions along your route. If there's a jam ahead of you, you'll know. To get more details, tap the light to zoom out to an aerial view showing traffic speeds and incidents ahead. And if the traffic doesn't look good, you can choose an alternate route.

Search along route
For those times when you're already on the road and need to find a business, Google Maps Navigation searches along your route to give you results that won't take you far from your path. You can search for a specific business by name or by type, or you can turn on popular layers, such as gas stations, restaurants or parking.

Satellite view
Google Maps Navigation uses the same satellite imagery as Google Maps on the desktop to help you get to your destination. Turn on the satellite layer for a high-resolution, 3D view of your upcoming route. Besides looking cool, satellite view can help you make sense of complicated maneuvers.

Street View
If you want to know what your next turn looks like, double-tap the map to zoom into Street View, which shows the turn as you'll see it, with your route overlaid. And since locating an address can sometimes be tricky, we'll show you a picture of your destination as you approach the end of your route, so you'll know exactly what to look for.

Since there's nothing quite like seeing the product in action, we made this video to demonstrate a real-life example:


The first phone to have Google Maps Navigation and Android 2.0 is the Droid from Verizon. Google Maps Navigation is initially available in the United States. And like other Google Maps features, Navigation is free.

Click here to learn more and browse a gallery of product screenshots. Take Google Maps Navigation for a spin, and bring Internet-connected GPS navigation with you in your car.

Announcing Android 2.0 support in the SDK!

I am excited to announce that the Android SDK now supports Android 2.0 (also known as Eclair).

Android 2.0 brings new developer APIs for sync, Bluetooth, and a few other areas. Using the new sync, account manager and contacts APIs, you can write applications to enable users to sync their devices to various contact sources. You can also give users a faster way to communicate with others by embedding Quick Contact within your application. With the new Bluetooth API, you can now easily add peer-to-peer connectivity or gaming to your applications. To get a more complete list of the new capabilities you can add to your applications, please go to the Android 2.0 highlights page.

Current developers can use the SDK Manager to add Android 2.0 support to their SDK as well as update their SDK Tools to revision 3. New developers can download the Android SDK from the download site. After the download, Android platforms must be added using the SDK Manager

The SDK Manager allows you to add new Android platforms to your SDK.

Android SDK Tools, revision 3 is required to develop for Android 2.0. It includes support for code coverage through the Ant build system, as well as Mac OS X 10.6 (Snow Leopard) support for the SDK and related tools. For those of you who develop using Eclipse, we are releasing ADT version 0.9.4 through the usual Eclipse update mechanism.

Over the next few months, we expect to see more and more Android devices being released. These devices will be running Android 1.5, 1.6, or 2.0. We are also planning a minor version update of Android 2.0 towards the end of the year, and that will be the last update for 2009. Below are some of the things you can do to be better prepared:

  • Download the Android 2.0 platform and make sure your existing apps continue to work on new devices running Android 2.0.

  • Make sure that your apps work when using the WVGA (800x480) & FWVGA (854x480) emulator skins. We expect devices with these types of screen, running Android 2.0 to be launched soon.

Checkout the video below for more information about Android 2.0.


The Iterative Web App: Auto-expanding Compose Boxes

On April 7th, we announced a new version of Gmail for mobile for iPhone and Android-powered devices. Among the improvements was a complete redesign of the web application's underlying code which allows us to more rapidly develop and release new features that users have been asking for, as explained in our first post. We'd like to introduce The Iterative Webapp, a series where we will continue to release features for Gmail for mobile. Today: Auto-expanding compose boxes

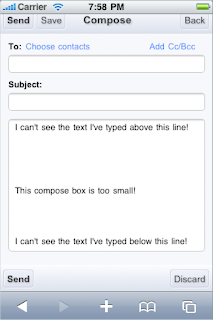
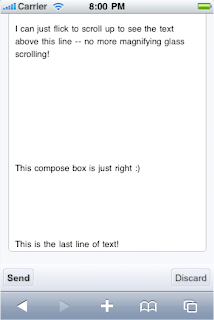
When composing a message on my phone, I really want to see as much of my draft as possible and make use of all the available screen space. One of my biggest gripes is a fixed-size compose box that restricts me to only a couple lines of visible text when my screen still has room to display more lines.

Today we launched auto-expanding compose boxes in Gmail for iPhone. This makes composing longer messages much easier since you're able to see more of the text you've typed. Just keep typing until you get near the bottom and then the compose box will magically expand by a few lines! As an added bonus, for all those iPhone users out there, auto-expanding compose boxes take away the need to press and hold to scroll with the magnifying glass! Instead, you can flick to scroll, much like you would normally do to scroll up and down a webpage. (On Android-powered devices, this hasn't been much of a problem, thanks to the trackball.)


While we're on the subject of making it easier to view content in Gmail, one more bit of news. We've been working on ways to make inline images show up in your messages, and you can now get some of those images to display by following these steps.

To try out, visit gmail.com on your iPhone/iPod touch (OS 2.2.1 or above, US English only) and create a home screen link for easy access.


by Casey Ho, Software Engineer, Google Mobile

UI framework changes in Android 1.6

Android 1.6 introduces numerous enhancements and bug fixes in the UI framework. Today, I'd like to highlight three two improvements in particular.

Optimized drawing

The UI toolkit introduced in Android 1.6 is aware of which views are opaque and can use this information to avoid drawing views that the user will not be able to see. Before Android 1.6, the UI toolkit would sometimes perform unnecessary operations by drawing a window background when it was obscured by a full-screen opaque view. A workaround was available to avoid this, but the technique was limited and required work on your part. With Android 1.6, the UI toolkit determines whether a view is opaque by simply querying the opacity of the background drawable. If you know that your view is going to be opaque but that information does not depend on the background drawable, you can simply override the method called isOpaque():

@Override
public boolean isOpaque() {
return true;
}

The value returned by isOpaque() does not have to be constant and can change at any time. For instance, the implementation of ListView in Android 1.6 indicates that a list is opaque only when the user is scrolling it.

Updated: Our apologies—we spoke to soon about isOpaque(). It will be available in a future update to the Android platform.

More flexible, more robust RelativeLayout

RelativeLayout is the most versatile layout offered by the Android UI toolkit and can be successfully used to reduce the number of views created by your applications. This layout used to suffer from various bugs and limitations, sometimes making it difficult to use without having some knowledge of its implementation. To make your life easier, Android 1.6 comes with a revamped RelativeLayout. This new implementation not only fixes all known bugs in RelativeLayout (let us know when you find new ones) but also addresses its major limitation: the fact that views had to be declared in a particular order. Consider the following XML layout:

<?xml version="1.0" encoding="utf-8"?>

<RelativeLayout xmlns:android="http://schemas.android.com/apk/res/android"
android:layout_width="fill_parent"
android:layout_height="64dip"
android:padding="6dip">

<TextView
android:id="@+id/band"
android:layout_width="fill_parent"
android:layout_height="26dip"

android:layout_below="@+id/track"
android:layout_alignLeft="@id/track"
android:layout_alignParentBottom="true"

android:gravity="top"
android:text="The Airborne Toxic Event" />

<TextView
android:id="@id/track"
android:layout_marginLeft="6dip"
android:layout_width="fill_parent"
android:layout_height="26dip"

android:layout_toRightOf="@+id/artwork"

android:textAppearance="?android:attr/textAppearanceMedium"
android:gravity="bottom"
android:text="Sometime Around Midnight" />

<ImageView
android:id="@id/artwork"
android:layout_width="56dip"
android:layout_height="56dip"
android:layout_gravity="center_vertical"

android:src="@drawable/artwork" />

</RelativeLayout>

This code builds a very simple layout—an image on the left with two lines of text stacked vertically. This XML layout is perfectly fine and contains no errors. Unfortunately, Android 1.5's RelativeLayout is incapable of rendering it correctly, as shown in the screenshot below.

The problem is that this layout uses forward references. For instance, the "band" TextView is positioned below the "track" TextView but "track" is declared after "band" and, in Android 1.5, RelativeLayout does not know how to handle this case. Now look at the exact same layout running on Android 1.6:

As you can see Android 1.6 is now better able to handle forward reference. The result on screen is exactly what you would expect when writing the layout.

Easier click listeners

Setting up a click listener on a button is very common task, but it requires quite a bit of boilerplate code:

findViewById(R.id.myButton).setOnClickListener(new View.OnClickListener() {
public void onClick(View v) {
// Do stuff
}
});

One way to reduce the amount of boilerplate is to share a single click listener between several buttons. While this technique reduces the number of classes, it still requires a fair amount of code and it still requires giving each button an id in your XML layout file:

View.OnClickListener handler = View.OnClickListener() {
public void onClick(View v) {
switch (v.getId()) {
case R.id.myButton: // doStuff
break;
case R.id.myOtherButton: // doStuff
break;
}
}
}

findViewById(R.id.myButton).setOnClickListener(handler);
findViewById(R.id.myOtherButton).setOnClickListener(handler);

With Android 1.6, none of this is necessary. All you have to do is declare a public method in your Activity to handle the click (the method must have one View argument):

class MyActivity extends Activity {
public void myClickHandler(View target) {
// Do stuff
}
}

And then reference this method from your XML layout:

<Button android:onClick="myClickHandler" />

This new feature reduces both the amount of Java and XML you have to write, leaving you more time to concentrate on your application.

The Android team is committed to helping you write applications in the easiest and most efficient way possible. We hope you find these improvements useful and we're excited to see your applications on Android Market.

Google Custom Search for mobile

Google Custom Search makes it easy for web site owners to add Google-powered search boxes to their sites. Since a rapidly growing percentage of web search traffic originates from smartphones, we're pleased to announce that Google Custom Search now formats search results for mobile phones.

If you own a web site and add a Google Custom Search box to it, when your users access the site on an Android-powered phone, iPhone, iPod Touch, or Palm Pre, they will can see optimized search results formatted for these devices. When they search on your web site, they are can be redirected to a Google-hosted Custom Search mobile results page created specifically for your Custom Search engine. If you'd like to serve these mobile results from your own web site, you can host your own version of the mobile Custom Search home page.


You can test this out on your phone right now. Here are a few samples: search for user-generated content (e.g., search for "zakumi") from sites like Wikipedia or Knol, or look for more information on Custom Search (e.g., search for "promotion"). As you can see, Custom Mobile Search results can match the look and feel of your own website, and we've enabled interactive features, such as label tabs for navigation, as well as promotions. Look for more features coming soon, too. For more information on Custom Search, and more details on the mobile configuration, visit the Custom Search blog.

Let us know how this works on your favorite smartphone.

Update on 10/23 @ 9:06 AM: Note that some configuration is required for the mobile-formatted results to be shown.

Layers come to Google Maps for BlackBerry

We're excited to announce that version 3.2 of Google Maps for mobile is now available for BlackBerry. This release contains many of the same features we recently launched on Windows Mobile and S60, including Layers.

Layers make it easy to view various types of information on your map and are especially helpful in situations when you're traveling somewhere new. For example, you can turn on the Wikipedia layer to read entries about nearby places, then use the transit lines layer to help map out a route. Or you can use the My Maps feature of Google Maps to create a collection of places you're planning to visit on your trip and then use Google Maps for mobile to access it from the road. You can also turn on the Google Latitude layer to see your friends' locations.

My coworker Mat is a big fan of Layers and made the below video to show you how he uses the feature. Check out the video, and get the latest version of Google Maps for your phone by visiting m.google.com/maps from your phone's browser.


Upload photos to Panoramio straight from your iPhone!

Panoramio is a community of people who enjoy sharing photos of places with the rest of the world. These photos are surfaced in Google Earth and Google Maps as photo layers, where millions of users can see them.

Panoramio has just launched an application that makes it easy to upload photos to Panoramio straight from your iPhone. Read about it on the Panoramio Blog. Also, we're working hard on the Android version, so keep an eye out for it!


Posted by Fernando Delgado, Product Manager, Panoramio Team

Make your web pages and applications Go Mobile too

We wouldn't be Google if we had a whole week of tips and tricks about all things mobile without giving a nod to the technical crowd. To conclude our week, we're asking you to "Go Mobile!" by making the mobile web faster. Read our article for a collection of best practices, tips, and resources for mobile web developers, part of our initiative at code.google.com/speed.

Following a marathon-and-a-half with Latitude

A few months ago, I started something crazy. Like a lot of Googlers, I work in Mountain View, CA but live in San Francisco, 37 miles away. When I moved to SF, I got hooked on the local cycling craze, and I fell in with a group that cycles to commute. Early on, biking to work was something audacious. Eventually, I decided that I wanted to do something that felt audacious again. So I decided to run to work to raise money for Teach for America.

Now 37 miles is a lot -- about a marathon and a half. I'm thinking it'll take me about 6 hours. For the past 4 months I've been training, and now finally, tomorrow is the big day! Throughout the training, lots of people have said they'd love to see the run, but oddly, none of them were up for coming along. So, I decided to do the next best thing. I'm going to take my Latitude-enabled phone with me, and let people follow along from home. I've been blogging about my training and I've embedded the Google public location badge on my blog for the big day. This badge lets me make my Latitude location public and share my progress on the run with anyone who views my blog, even if we're not Latitude friends.

So, if you're up tomorrow, October 16, at 2:30 AM Pacific Daylight Time (or anytime over the next 6 hours or so), check out my progress and see if I make it into work on time. I could use the virtual encouragement!


Updated: I made it! 6 hours, 90 ounces of water, 3 energy gels and 1 banana later. Well, time to get back to work. Hope you all get our and run today!

Posted by Matt Ghering, Googler

Want to reach customers? Go Mobile!

As we continue our week of all things mobile, we wanted to offer some tips and tricks to any marketers, advertisers, agencies, or businesses who want to use mobile as a platform to reach their customers. For ideas on how to work mobile into marketing campaigns, check out our post on the Agency blog.

You Ask, We Answer. Go Mobile!

This week, as part of our celebration of all things mobile, we posed you this question - what do you want to know? And you told us! After two days, 519 people submitted 133 questions and cast 4,607 votes. We saw some common themes in your questions, so we grouped several together to address some of the most popular topics.

Google Voice
We received an overwhelming number of Google Voice questions - 3 out of the top 5 questions were about Google Voice - and we're happy you're so enthusiastic about and interested in this new product! As far as making Voice available to more users, we began giving current users the ability to invite friends and family on Tuesday. We will continue sending out invitations to people who have requested them on our website, and we plan to make additional friends and family invitations available in the future. For those of you outside the US, we plan to make Google Voice available internationally; however, we don't have specifics to share at this time. As for new features, we're certainly evaluating which highly requested features we can add to improve Google Voice, such as number portability, though we don't have anything to announce quite yet. Keep up on the latest with Google Voice by following their blog at http://googlevoiceblog.blogspot.com/.

Googlers' favorite phones
You asked us which phones are the most favored here on the Google mobile team. The answer's not particularly juicy, but it's honest: every phone! You'll see Googlers walking around campus carrying just about every phone under the stars, including multiple Android-powered devices, iPhone, BlackBerry, Windows Mobile, Nokia, etc. And the Mobile team takes it up a notch. It's quite common for us to carry multiple phones at any given time, and as we sit down in a meeting, we often see someone unload five different phones from their pockets onto the table. Don't have the right one handy? We just head to our "Sky Lab" and grab one of the over 800 phones available. By using lots of different devices, we can make sure we're designing products that work well for you, no matter which device YOU are using. We understand that the phone someone chooses to use everyday varies with personal preference, but we generally prefer phones with great browsers and fast performance. Of course, it never hurts to have the newest toy on the block.

Google Wave for mobile
We're still early in Wave's preview, but you can currently access Google Wave on both Android-powered devices and the iPhone by pointing the phone's browser to wave.google.com. Please note that we're still in preview phase, and as we've mentioned before, you may experience occasional downtime or run into some bugs with Wave on your mobile phone, similar to when you access Google Wave from your computer.

Web vs. App
We're often asked why certain products, such as Google Reader, are available as a web application, accessible through the browser, and not a native, downloadable application. At Google, we believe in the power of the web to give us the flexibility to build one app that can run in the browser on multiple phones, rather than developing a different app for every platform. With more capable mobile browsers and technologies like HTML5 and Gears, web apps deliver a great experience because they closely mirror the desktop web in overall look, feel and functionality. They also let us iterate fast and add lots of cool features quickly without having to build from scratch each feature for various devices and platforms. Of course in some cases, investing in native applications for multiple platforms make sense. For example, with Google Maps for mobile, the native app lets us get your location or quickly process lots of data, such as map tiles. That said, new browsers and faster phones are allowing for more powerful web apps - such as Google Maps on Palm Pre or Google Latitude on iPhone - that can also get your location and that are almost as fast as native apps. In the end, there are a lot of users out there on a lot of phones, and we develop our products to put the best experience possible in your hands and your pockets.

In some cases, such as Gmail for certain phones, we offer both a native and web app because we want users to have choice in deciding how they access their information. We believe that both methods - web apps and native apps - offer a rich mobile experience, and we are committed to providing the best possible experience to users, regardless of the underlying development technology.

Mobile Product Roadmap
You also asked lots of great questions around product and feature development and availability. As we mentioned on the original Q & A page, we aren't able to provide forward-looking information on features or products, but we love your enthusiasm for ideas around how we can make existing Google Mobile products more useful or just make more Google Mobile products period. We're always working to improve all of our mobile products and will continue to do so with our eyes and ears open for your ideas and feedback. So keep it coming in the Google Mobile Blog, the Help Forum, and especially the Product Ideas page!

Go Mobile!


Update - Go Mobile!

We've published some tips, tricks, and stories on various blogs about our mobile products, including Search, YouTube, Maps, and Gmail. We've also started tweeting - check out the YouTube and Google Maps Twitter accounts for tips about those mobile products. And as a reminder, you have until 11:59pm Pacific time today to submit and vote on questions for the Google Mobile team. We'll be answering some of the top questions on this blog tomorrow.

Captain's Log

This week marks the anniversary of Star Trek's original pilot episode "The Cage", and with it, the first appearance of the iconic Communicator. As one of the inspirations for today's mobile devices, the Communicator did more than just long-range voice calls; in fact, many of its locator and universal translation services still outpace today's state of the art. What's more, the Communicator was so critical to the daily workings of Starfleet that cadets' 4-year curriculum included mandatory courses in communications engineering.

Today's brand of mobile user doesn't need four years to figure out their phone. But this week, and with a tip of the hat to the USS Enterprise for the Communicator's anniversary, we did want to celebrate all things mobile by sharing some of Google's favorite mobile tips and tricks. All week long, we're going to be tweeting and blogging our top tips for using Google Search, Gmail, Google Maps, YouTube, and more on your phone. We want to help every cadet go mobile, and get more out of their existing phone. Cadets with questions can ask them here until 11:59 PM Pacific Time, Tuesday night. Keep an eye on the Google Mobile Blog for answers to some of your questions on Wednesday, and tips for advertisers and developers later in the week. Everyone can boldly go... mobile!


Quick Search Box for Android: Search your phone and the web

I'm happy to announce Quick Search Box (QSB) for Android, a fast and versatile new system-wide search experience, available right from your phone's home screen. Since keystrokes are at a premium when you're typing on your phone, Quick Search Box provides suggestions as you type, making it easy to access whatever you're looking for by typing just a few characters.


Rather than giving you one search box for the web and another for your phone, QSB provides one single search box to let you search content on your phone, including apps, contacts, and browser history, as well as content from the web, like personalized search suggestions, local business listings, stock quotes, weather, and flight status, all without opening the browser. QSB even learns from your habits and provides faster access to the items you search for and use most often (by, for example, moving them higher on the suggestions list).


You can now also tap the microphone button next to the search box to search the web and call contacts by voice. The next time you want to search the web or call a friend, try speaking your query, like "pictures of the Golden Gate Bridge at sunset", or the name of a contact, like "Call Dave Burke, mobile phone", to save even more time. Note that voice search currently only works in English.


Finally, one of the coolest things about QSB is that it's not limited to searching what we think is useful - third party apps can also include suggestions in the list, making it faster to access the content you want from those apps, too. Look on Android Market for apps that support QSB, and enable their suggestions from the system search settings. (And if you're an app developer, check out our developer blog for more on how to leverage QSB for your app.)

We hope Quick Search Box will change the way you use your Android-powered phone by shortening the time and effort it takes to get the information you want while you're on the go. It's available in Android 1.6, so check it out and enjoy!


Support for additional screen resolutions and densities in Android

You may have heard that one of the key changes introduced in Android 1.6 is support for new screen sizes. This is one of the things that has me very excited about Android 1.6 since it means Android will start becoming available on so many more devices. However, as a developer, I know this also means a bit of additional work. That's why we've spent quite a bit of time making it as easy as possible for you to update your apps to work on these new screen sizes.

To date, all Android devices (such as the T-Mobile G1 and Samsung I7500, among others) have had HVGA (320x480) screens. The essential change in Android 1.6 is that we've expanded support to include three different classes of screen sizes:

  • small: devices with a screen size smaller than the T-Mobile G1 or Samsung I7500, for example the recently announced HTC Tattoo
  • normal: devices with a screen size roughly the same as the G1 or I7500.
  • large: devices with a screen size larger than the G1 or I7500 (such as a tablet-style device.)

Any given device will fall into one of those three groups. As a developer, you can control if and how your app appears to devices in each group by using a few tools we've introduced in the Android framework APIs and SDK. The documentation at the developer site describes each of these tools in detail, but here they are in a nutshell:

  • new attributes in AndroidManifest for an application to specify what kind of screens it supports,
  • framework-level support for using image drawables/layouts correctly regardless of screen size,
  • a compatibility mode for existing applications, providing a pseudo-HVGA environment, and descriptions of compatible device resolutions and minimum diagonal sizes.

The documentation also provides a quick checklist and testing tips for developers to ensure their apps will run correctly on devices of any screen size.

Once you've upgraded your app using Android 1.6 SDK, you'll need to make sure your app is only available to users whose phones can properly run it. To help you with that, we've also added some new tools to Android Market.

Until the next time you upload a new version of your app to Android Market, we will assume that it works for normal-class screen sizes. This means users with normal-class and large-class screens will have access to these apps. Devices with "large" screens simply run these apps in a compatibility mode, which simulates an HVGA environment on the larger screen.

Devices with small-class screens, however, will only be shown apps which explicitly declare (via the AndroidManifest) that they will run properly on small screens. In our studies, we found that "squeezing" an app designed for a larger screen onto a smaller screen often produces a bad result. To prevent users with small screens from getting a bad impression of your app (and reviewing it negatively!), Android Market makes sure that they can't see it until you upload a new version that declares itself compatible.

We expect small-class screens, as well as devices with additional resolutions in Table 1 in the developer document to hit the market in time for the holiday season. Note that not all devices will be upgraded to Android 1.6 at the same time. There will be significant number of users still with Android 1.5 devices. To use the same apk to target Android 1.5 devices and Android 1.6 devices, build your apps using Android 1.5 SDK and test your apps on both Android 1.5 and 1.6 system images to make sure they continue to work well on both types of devices. If you want to target small-class devices like HTC Tattoo, please build your app using the Android 1.6 SDK. Note that if your application requires Android 1.6 features, but does not support a screen class, you need to set the appropriate attributes to false. To use optimized assets for normal-class, high density devices like WVGA, or for low density devices please use the Android 1.6 SDK.

Introducing Search Options for mobile

Finding the exact information you need sometimes requires filtering and refining your search results. Earlier in the year, we launched a collection of tools called Search Options which enable you to easily and quickly do this from a computer. Today in the US, we are making Search Options available on Android/iPhone/Palm WebOS devices so that you can slice and dice your mobile search results as well. For example, suppose you are shopping at a store for a camera, and you would like to see what users have been saying about a specific model within the past week. You can do this simply by searching for the name of the product. Then, on the search results page, use "Options" to filter by "Forums" and refine further by choosing "Past week". See the screenshots below for a sample query. Try these and other Search Options yourself by simply doing a mobile search on google.com and selecting Options.


ADC 2 Round 1 Scoring Complete

ADC 2 icon

The response to round one of the Android Developer Challenge 2 has been phenomenal! We originally expected that it would take two weeks to get all the necessary data to complete scoring. Over the last 10 days, more than 26,000 Android users reviewed and submitted our target of over 100 scores per application. With this enthusiastic support of the Android community, we are closing the first round of ADC 2 judging today.

We will now be reviewing the results and preparing for round 2. Please stay tuned for information about round 2, where the community, combined with a panel of judges, will narrow down the top 20 applications in each category to determine the final winners. Until then, users with the ADC 2 judging application currently installed will get a notice saying that round 1 is over. When round 2 opens, the judging application will resume giving out new submissions to score. We look forward to seeing the results of the final round and hope that you choose to help us score these top apps as well!

Gestures on Android 1.6

Touch screens are a great way to interact with applications on mobile devices. With a touch screen, users can easily tap, drag, fling, or slide to quickly perform actions in their favorite applications. But it's not always that easy for developers. With Android, it's easy to recognize simple actions, like a swipe, but it's much more difficult to handle complicated gestures, which also require developers to write a lot of code. That's why we have decided to introduce a new gestures API in Android 1.6. This API, located in the new package android.gesture, lets you store, load, draw and recognize gestures. In this post I will show you how you can use the android.gesture API in your applications. Before going any further, you should download the source code of the examples.

Creating a gestures library

The Android 1.6 SDK comes with a new application pre-installed on the emulator, called Gestures Builder. You can use this application to create a set of pre-defined gestures for your own application. It also serves as an example of how to let the user define his own gestures in your applications. You can find the source code of Gestures Builders in the samples directory of Android 1.6. In our example we will use Gestures Builder to generate a set of gestures for us (make sure to create an AVD with an SD card image to use Gestures Builder.) The screenshot below shows what the application looks like after adding a few gestures:

As you can see, a gesture is always associated with a name. That name is very important because it identifies each gesture within your application. The names do not have to be unique. Actually it can be very useful to have several gestures with the same name to increase the precision of the recognition. Every time you add or edit a gesture in the Gestures Builder, a file is generated on the emulator's SD card, /sdcard/gestures. This file contains the description of all the gestures, and you will need to package it inside your application inside the resources directory, in /res/raw.

Loading the gestures library

Now that you have a set of pre-defined gestures, you must load it inside your application. This can be achieved in several ways but the easiest is to use the GestureLibraries class:

mLibrary = GestureLibraries.fromRawResource(this, R.raw.spells);
if (!mLibrary.load()) {
finish();
}

In this example, the gesture library is loaded from the file /res/raw/spells. You can easily load libraries from other sources, like the SD card, which is very important if you want your application to be able to save the library; a library loaded from a raw resource is read-only and cannot be modified. The following diagram shows the structure of a library:

Recognizing gestures

To start recognizing gestures in your application, all you have to do is add a GestureOverlayView to your XML layout:

<android.gesture.GestureOverlayView
android:id="@+id/gestures"
android:layout_width="fill_parent"
android:layout_height="0dip"
android:layout_weight="1.0" />

Notice that the GestureOverlayView is not part of the usual android.widget package. Therefore, you must use its fully qualified name. A gesture overlay acts as a simple drawing board on which the user can draw his gestures. You can tweak several visual properties, like the color and the width of the stroke used to draw gestures, and register various listeners to follow what the user is doing. The most commonly used listener is GestureOverlayView.OnGesturePerformedListener which fires whenever a user is done drawing a gesture:

GestureOverlayView gestures = (GestureOverlayView) findViewById(R.id.gestures);
gestures.addOnGesturePerformedListener(this);

When the listener fires, you can ask the GestureLibrary to try to recognize the gesture. In return, you will get a list of Prediction instances, each with a name - the same name you entered in the Gestures Builder - and a score. The list is sorted by descending scores; the higher the score, the more likely the associated gesture is the one the user intended to draw. The following code snippet demonstrates how to retrieve the name of the first prediction:

public void onGesturePerformed(GestureOverlayView overlay, Gesture gesture) {
ArrayList predictions = mLibrary.recognize(gesture);

// We want at least one prediction
if (predictions.size() > 0) {
Prediction prediction = predictions.get(0);
// We want at least some confidence in the result
if (prediction.score > 1.0) {
// Show the spell
Toast.makeText(this, prediction.name, Toast.LENGTH_SHORT).show();
}
}
}

In this example, the first prediction is taken into account only if it's score is greater than 1.0. The threshold you use is entirely up to you but know that scores lower than 1.0 are typically poor matches. And this is all the code you need to create a simple application that can recognize pre-defined gestures (see the source code of the project GesturesDemo):

Gestures overlay

In the example above, the GestureOverlayView was used as a normal view, embedded inside a LinearLayout. However, as its name suggests, it can also be used as an overlay on top of other views. This can be useful to recognize gestures in a game or just anywhere in the UI of an application. In the second example, called GesturesListDemo, we'll create an overlay on top of a list of contacts. We start again in Gestures Builder to create a new set of pre-defined gestures:

And here is what the XML layout looks like:

<android.gesture.GestureOverlayView
xmlns:android="http://schemas.android.com/apk/res/android"
android:id="@+id/gestures"
android:layout_width="fill_parent"
android:layout_height="fill_parent"

android:gestureStrokeType="multiple"
android:eventsInterceptionEnabled="true"
android:orientation="vertical">

<ListView
android:id="@android:id/list"
android:layout_width="fill_parent"
android:layout_height="fill_parent" />

</android.gesture.GestureOverlayView>

In this application, the gestures view is an overlay on top of a regular ListView. The overlay also specifies a few properties that we did not need before:

  • gestureStrokeType: indicates whether we want to recognize gestures made of a single stroke or multiple strokes. Since one of our gestures is the "+" symbol, we need multiple strokes
  • eventsInterceptionEnabled: when set to true, this property tells the overlay to steal the events from its children as soon as it knows the user is really drawing a gesture. This is useful when there's a scrollable view under the overlay, to avoid scrolling the underlying child as the user draws his gesture
  • orientation: indicates the scroll orientation of the views underneath. In this case the list scrolls vertically, which means that any horizontal gestures (like action_delete) can immediately be recognized as a gesture. Gestures that start with a vertical stroke must contain at least one horizontal component to be recognized. In other words, a simple vertical line cannot be recognized as a gesture since it would conflict with the list's scrolling.

The code used to load and set up the gestures library and overlay is exactly the same as before. The only difference is that we now check the name of the predictions to know what the user intended to do:

public void onGesturePerformed(GestureOverlayView overlay, Gesture gesture) {
ArrayList<Prediction> predictions = mLibrary.recognize(gesture);
if (predictions.size() > 0 && predictions.get(0).score > 1.0) {
String action = predictions.get(0).name;
if ("action_add".equals(action)) {
Toast.makeText(this, "Adding a contact", Toast.LENGTH_SHORT).show();
} else if ("action_delete".equals(action)) {
Toast.makeText(this, "Removing a contact", Toast.LENGTH_SHORT).show();
} else if ("action_refresh".equals(action)) {
Toast.makeText(this, "Reloading contacts", Toast.LENGTH_SHORT).show();
}
}
}

The user is now able to draw his gestures on top of the list without interfering with the scrolling:

The overlay even gives visual clues as to whether the gesture is considered valid for recognition. In the case of a vertical overlay, for instance, a single vertical stroke cannot be recognized as a gesture and is therefore drawn with a translucent color:

It's your turn

Adding support for gestures in your application is easy and can be a valuable addition. The gestures API does not even have to be used to recognize complex shapes; it will work equally well to recognize simple swipes. We are very excited by the possibilities the gestures API offers, and we're eager to see what cool applications the community will create with it.

AdSense for Mobile optimized for high-end phones

(Cross-posted on the Official Google Blog)

High-end mobile phones, like iPhone, Android-powered devices and the Palm Pre, continue to grow — Gartner estimates that global sales of smartphones will soar by 27% in 2009, to 177 million units. Naturally, as a result more and more people are browsing the web on the go.

Because these devices offer a browsing experience that is similar to desktop computers, advertising on smartphones is a natural extension for any AdWords campaign. However, it's not always been easy for advertisers to reach people on smartphones. That's why we're investing in new high-end mobile advertising products such as our search ad options for high-end phones and AdSense for mobile applications. We hope to make advertising on high-end mobile devices as intuitive, effective and user-friendly as our existing AdWords tools.

Today, we're excited to announce a new feature for our AdSense mobile publishers that enables them to serve text and image ads on their sites — specifically on these high-end smartphones. This helps mobile publishers earn revenue and fund more mobile-specific sites and web content.

New features like this help to nurture the smartphone ecosystem by encouraging the creation of more mobile content and by helping advertisers to grow their businesses by reaching new audiences. Our users' experience is also improved, with increasingly relevant and device-optimized mobile ads that load faster and fit better on small screens.

For more info about this feature, check out the Inside AdSense Blog.